Underwater Videography
A few years back underwater photography and videography were the preserve of professionals or wealthy amateurs but with the advent of the GoPro and other actions cameras, taking beautiful underwater video can be done by anyone these days on a relatively small budget. We take a look at some of the basic and more advanced equipment you will need to start shooting breathtaking videos that will wow your friends and family.

GoPro Hero 4 Silver & GoPro Hero 7 Black
These days you can start taking underwater videos a few minutes after setting up your new GoPro or action camera, most if not all are waterproof to a certain degree and you can buy protective cases if not. This article will mainly be centred around GoPros as this is where my experience lies mainly but most of what is written here can be applied to other action cameras too.
The first thing to do when looking at an action camera to to understand to what depth it is waterproof down to and if you’ll need any additional waterproof cases. For example, the GoPro Hero 4 shipped with a case that was waterproof down to around 40m and you could then buy a dedicated dive casing that was waterproof down to 60m, way more than recreational dive limits. The newer versions of the GoPro, the Hero 7 onwards are waterproof in their own right down to around 10m, which is fine for snorkelling, but you will need to buy an additional casing, the super suit, for even a standard 18m open water dive. You will also need to think about what sort of grip or arm you want, all sorts are available, I started out with the “floaty” a short arm on which I mounted the GoPro which worked really well. Other go for an extendable arm which allows them to get closer to some creatures that like to hide in hard to reach places. Its a matter of personal preference but you will need to consider whether a longer arm will make the footage very shaky and it will exaggerate the effect compared to a shorter arm. Below is a picture of my first, basic GoPro set up, a short arm, standard housing, red filter and video light. While it works reasonably well and is a good set up to get you started the major drawback is that the sidelight is too close to the lens meaning that is susceptible to backscatter if the water is murky or someone stirs up the bottom. Having said that it worked well for me for many dives and started me on my journey.

Basic set up with GoPro Hero 4, red filter and knot video light. The drawback to this arrangement is the light is too close to the lens and increases the chance of backscatter.
Having started out taking underwater video the first thing you’ll notice when reviewing your footage is that it looks very blue, as if a lot of the colour has been taken out. This is due to the way water absorbs the higher wavelength colours on spectrum such as red, orange and yellow. In fact the deeper you go, the more you will notice this effect. There are a few ways to counter this, the easiest and most common being to add a red filter on the front of your GoPro. This works pretty well and will definitely boost the quality of your footage, the second method is to add a video light, this again works really well, but mainly for closer subjects where the light can make a difference, for wide angle reef scapes a light won’t make much difference as again the higher wavelength colours will be absorbed by the water. The third method is to manually adjust the white balance on the camera or in post production. These are a bit more complicated to do so most people usually go with a combination of filter and light to get great looking results.
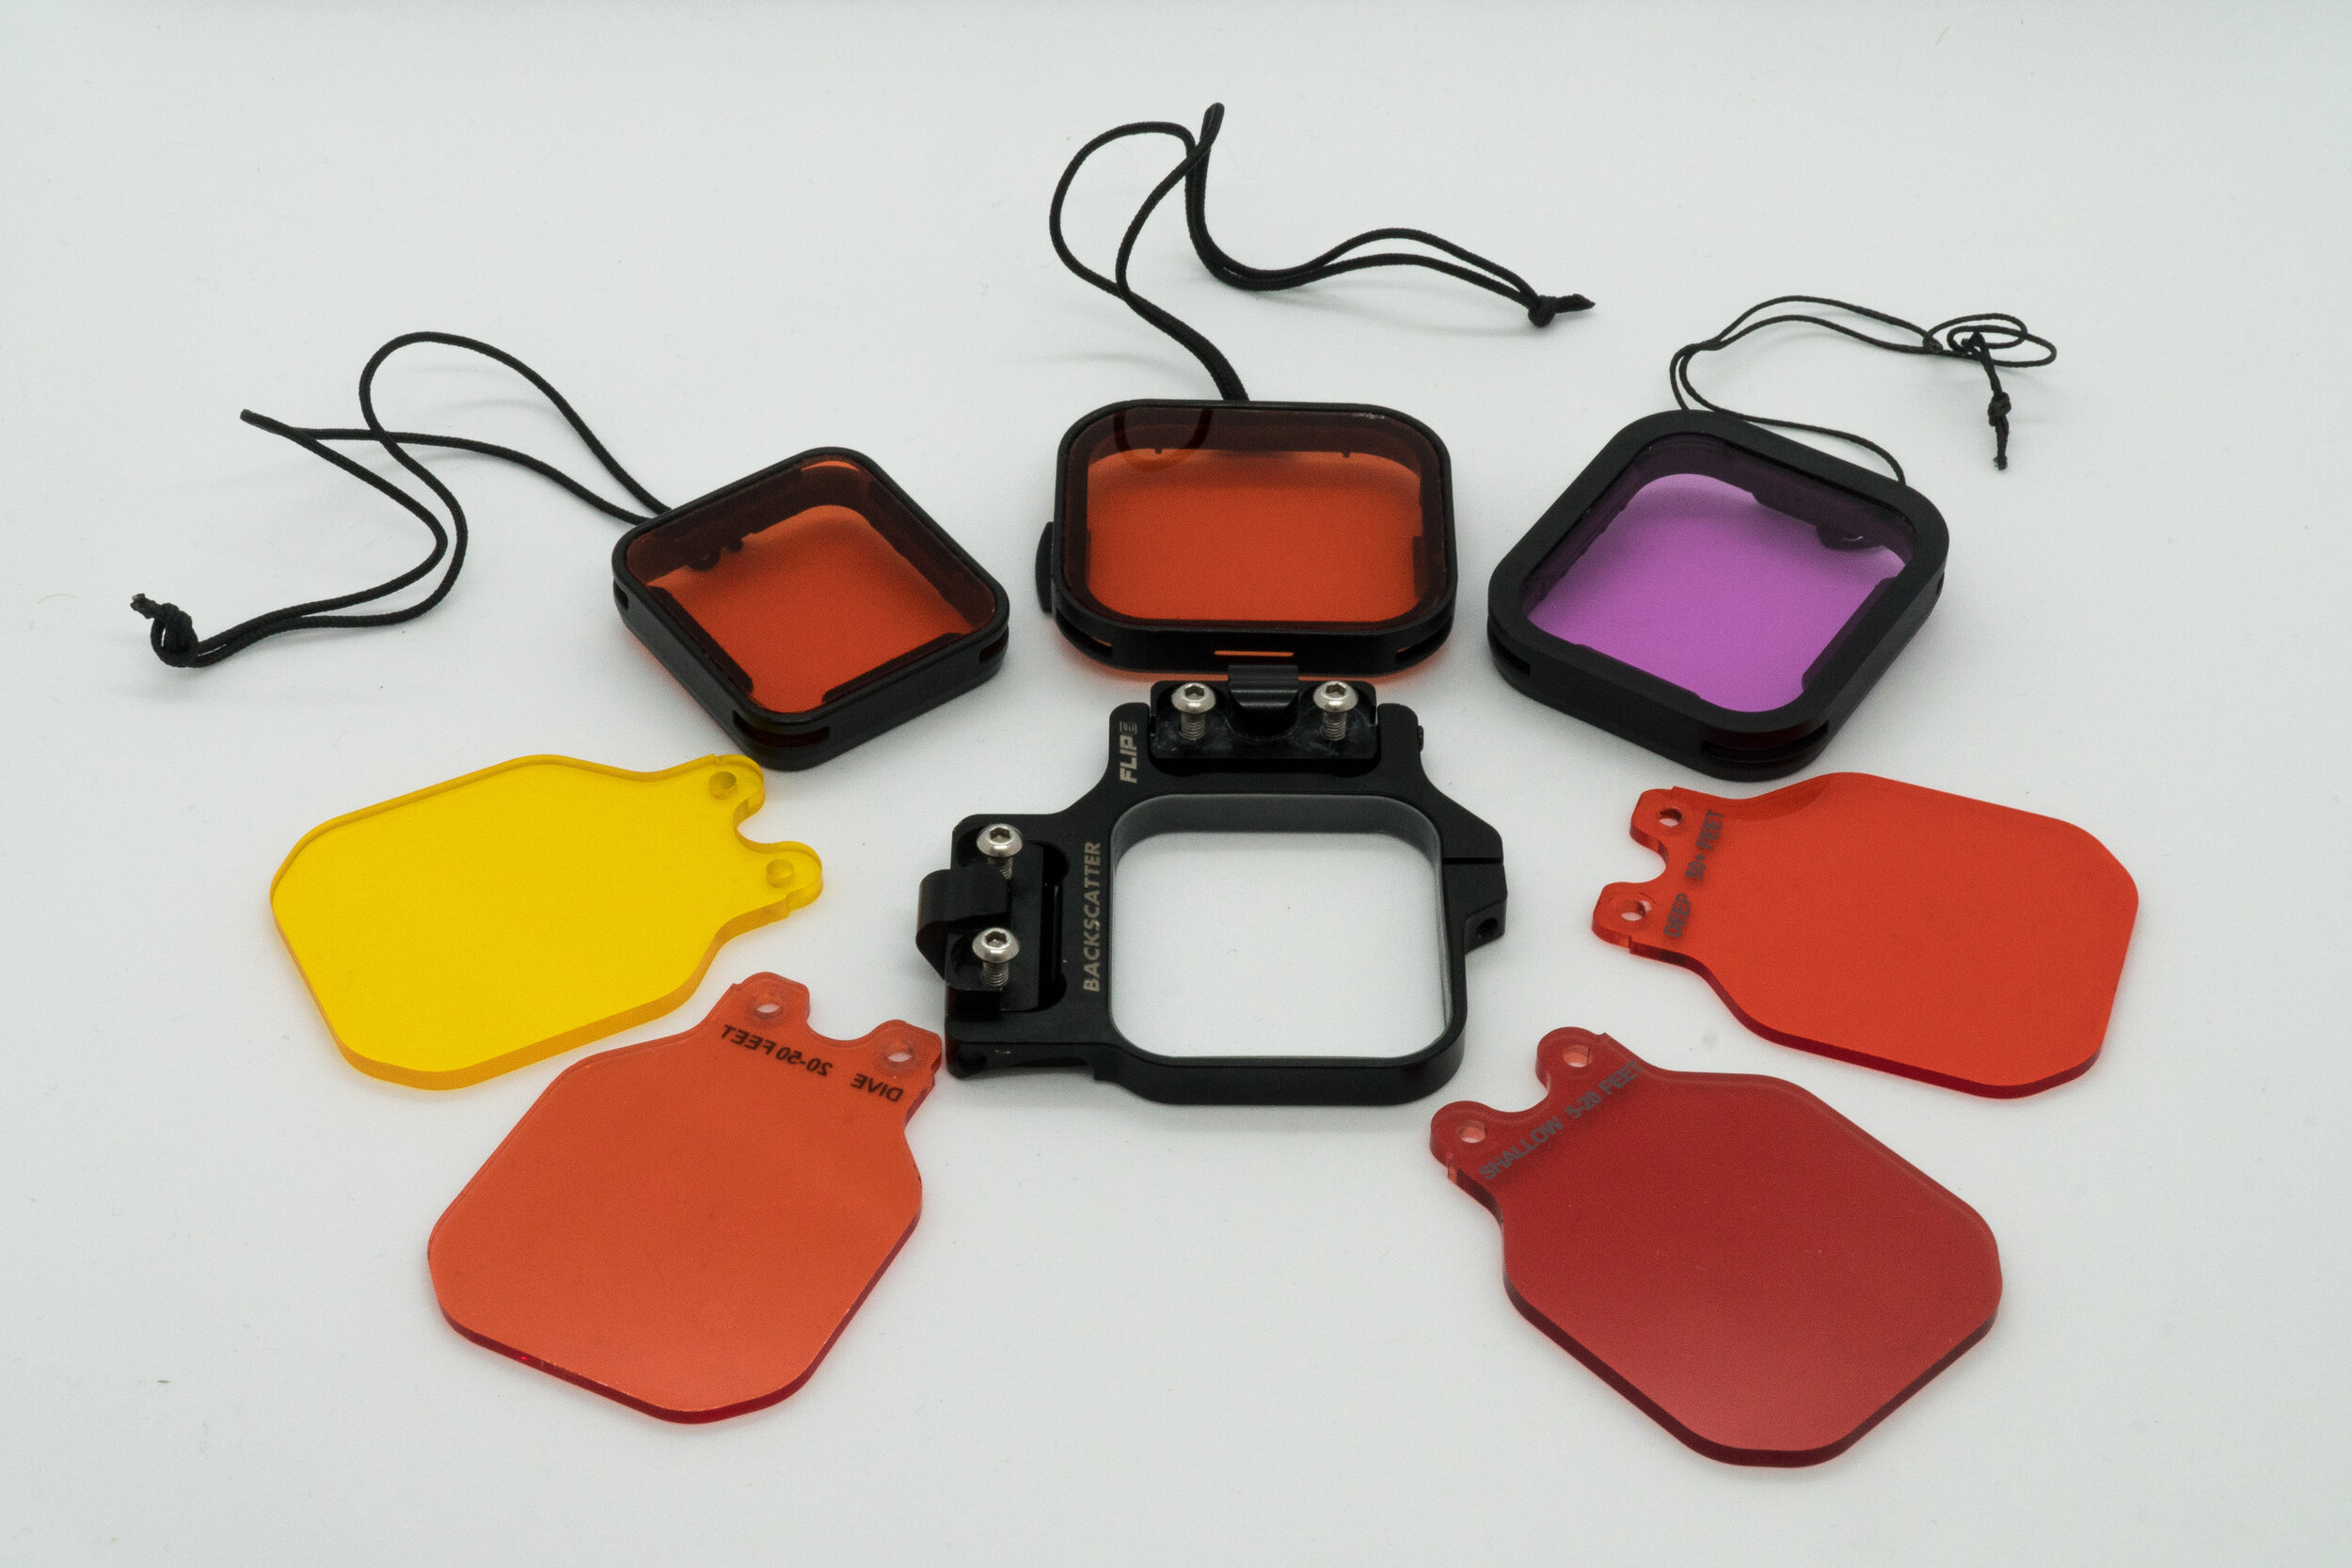
A selection of underwater filters
Filters are almost an essential for underwater video and you can invest in one without having to break the bank. The photo here shows a variety of filters available for the GoPro from the Hero 4 standard housing red filter, dive housing red filter, a green water purple filter for the Hero 7 supersuit and a backscatter flip attachment for the Hero 7. The advantage of a set up like the Backscatter Flip is that you don’t have to have the filter in place all the time, so if at the surface it can be easily moved out to ensure you don’t shoot red tinted footage at the beginning or end of your dive. It also allows you to use different graded filters for different depths or combine with a macro magnifier for small subjects where the GoPro struggles to focus on its own. A filter is the easiest and cheapest way to improve your underwater footage and should be the next item you invest in after your initial purchase of a GoPro and protective suit.
Adding a video light to your underwater set up is normally the next progression after a filter, however, it is much more expensive so a lot of casual divers don’t bother. However, if you are serious about getting the best possible footage then this should be your next purchase. You can spend varying amount of money on dive lights, and pictured are three different options. The first, a small rectangular light is the cheapest but the method of mounting it presents a few challenges and drawbacks as discussed above. My recommendation would be to go for a light similar to the two back, cylindrical lights shown towards the right hand side, the are more powerful, 1000 + lumens and can be mounted on a flexible arm which means they are more easily positioned to avoid backscatter and glare allowing for the best quality footage you can get. You would need to mount the GoPro on a tray which allows for the mounting of a flexible arm and these can be picked up at a relatively modest cost on line or from a dedicated dive equipment shop.

A selection of video lights
When choosing your GoPro or action camera think carefully about the functionality you will want, for example image stabilisation is something you should seriously consider. The original GoPros did not have this and while you can take good footage, especially if you are using a two handed tray, image stabilisation does make a huge difference and ensures you have a nice smooth video. You can do some of this in post production, however it takes huge amounts of computing power and the results are not always great. Another thing to watch out for is the image quality you are shooting in - these days 4k is standard as an option but be careful - again, the amount of processing power you will require to edit and render is significant and you will need high end computers and software at home to be able to manage this. Having said that, the results are stunning and it is worth the extra time spent in post processing. Below is a picture of my current GoPro set up, I have a one handed tray with a flexible arm that holds a 2500 lumen video light which gives great colour and vibrancy to any videos shot. It has a GoPro Hero 7 in a super suit with Backscatter Flip 6 red filter and magnifier. I tend to use the standard “dive” filter rather than the deep or shallow ones also supplied and have been really happy with the results. Check out the video at the bottom shot in Raja Ampat. Lastly, don’t forget an lanyard to be able to attach your GoPro rig to your BCD so you don’t drop & lose it, you’ve probably spent quite a bit of money on it so the last thing you want to do is to see it drop to the bottom of the ocean where you can’t get it back!

GoPro Hero 7 with Backscatter Flip filter and macro with X-Adventurer M2500 - a setup that will help you take the best footage you can.
Conclusions
So, in conclusion almost anyone these days can start to shot amazing underwater footage with a GoPro or other similar action camera. It is worth investing in a red filter as a minimum to ensure you can bring lifelike colour and vibrancy to your videos and if you can afford it really do consider investing in a video light as this really will ensure you get stunning results that are worthy of a Blue Planet documentary! One last thing to consider is editing software - I currently use Premiere Elements 2019 which allows me to edit 4K video - it also allows me to adjust the colour and white balance in post production as well which ensure really high quality videos. There are many video editing software programmes out there and if you are serious about producing great videos then another thing to consider. In short - its easy to start taking underwater video but the more you get into it, the more you will find yourself spending, like all things to do with scuba diving - unfortunately its not a cheap pastime to have.